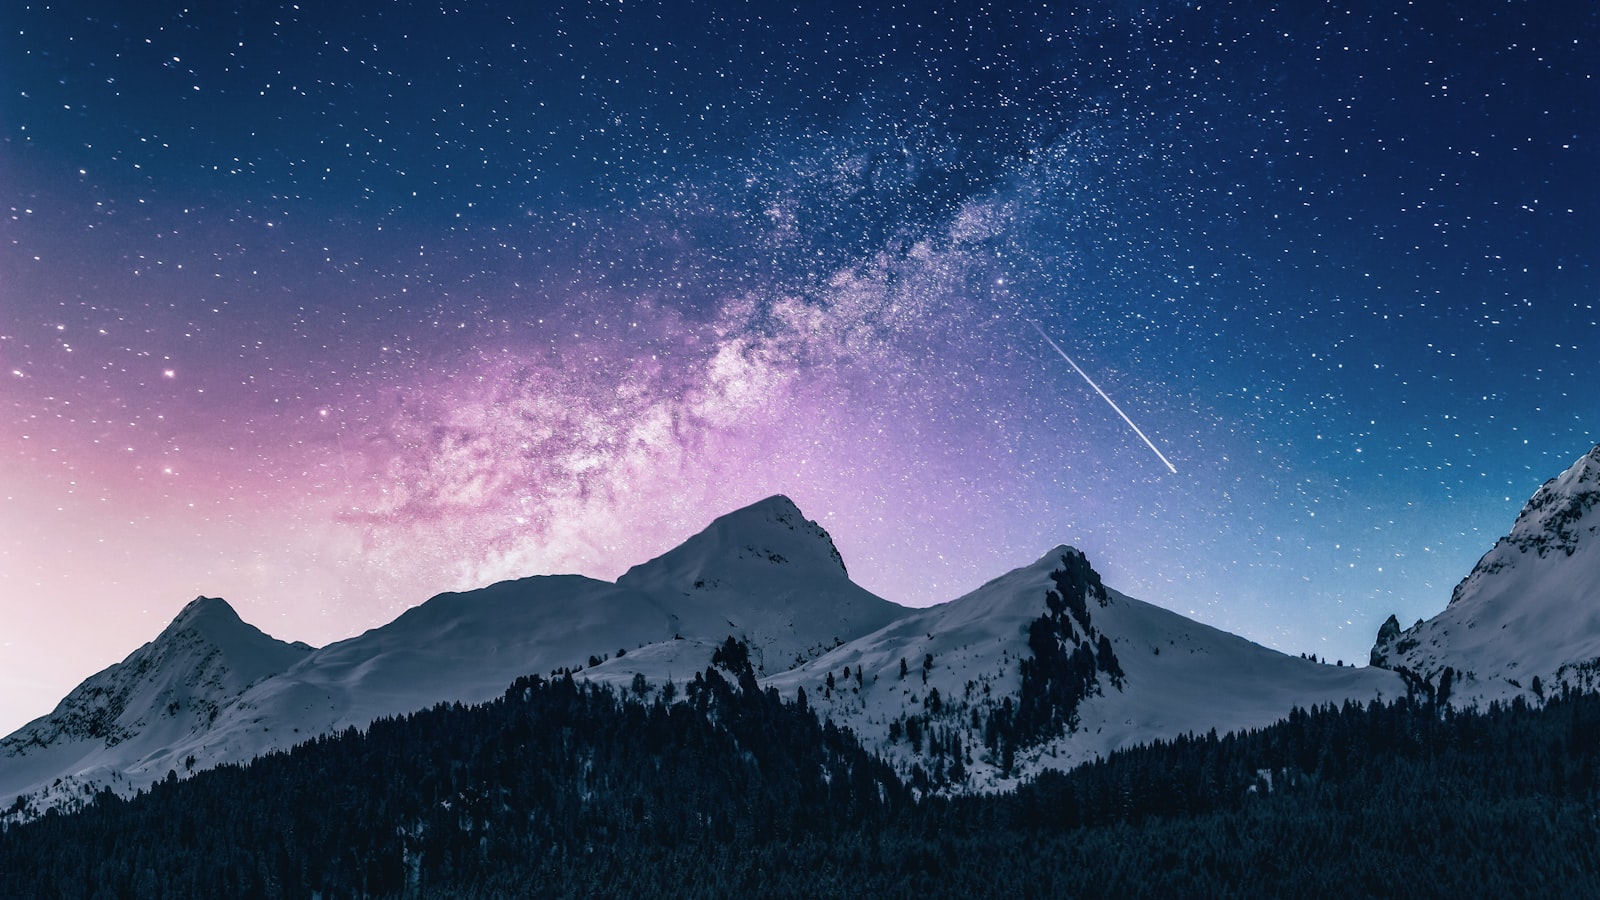
Night does not arrive as a problem to be solved. It arrives as a different kind of light. Streetlamps pool on wet pavement, windows glow amber, and the sky after sunset turns a blue so deep it barely registers as a color. Most people put their cameras away when the sun goes down. That is exactly when the interesting work begins.
Night photography has a reputation for being technical and frustrating. It can be, but the core of it is simple and forgiving once you understand what is actually happening: there is less light, so you need to give the camera more time to collect it. Everything else follows from that one idea.
Hold still, or let something else do it#
When there is plenty of light, your camera captures an image almost instantly. At night, it needs the shutter open far longer, sometimes for whole seconds. During those seconds, any movement of the camera smears the image into a blur. So the first skill of night photography is not a setting. It is stillness.
A tripod is the obvious answer, and if you have one, use it. But you do not need to buy anything to start. The world is full of steady surfaces. Rest your camera or phone on:
- A low wall, a railing, or a bench
- The roof of a parked car
- A small beanbag or even a folded jacket to angle it just so
Once the camera is steady, stop touching it at the moment of capture. Use a two-second self-timer so your finger is off the device before the shutter actually opens. On a phone, this single trick transforms night shots. The camera sits perfectly still, gathers light for as long as it needs, and gives you something clean instead of a smear.
Let time gather the light#
A long exposure is just a photograph taken slowly. The shutter stays open, light trickles in, and the sensor builds up a bright, detailed image from a scene that looked nearly black to your eye. This is why night photos can show color and texture you could barely make out while standing there.
Long exposures also do something magical with motion. Moving car headlights stretch into rivers of red and white. Flowing water turns to silk. People walking through the frame dissolve into soft ghosts or vanish entirely. The still things stay sharp; the moving things become streaks of light and time.
If your camera or phone has a night mode or a manual exposure control, this is the moment to use it. Start with a few seconds and look at the result. Too dark, give it more time. Too bright, give it less. You are not memorizing numbers, you are having a conversation with the scene.
The strange gift of night photography is patience. You set the shot, you wait, and the camera shows you a world your own eyes could not quite see. Rushing is the only real mistake.
Find the light that is already there#
Beginners often think night means darkness. It rarely does. Cities and towns are full of light after sunset, and the best night photographs are usually about finding it and arranging yourself around it.
Look for pools of light and the edges where light meets shadow. A person standing under a single streetlamp, a shopfront spilling glow onto the sidewalk, the reflection of neon in a puddle. These contrasts are where night photos come alive. Reflective surfaces are your friend, because wet streets and still water double every light source and add depth.
And do not overlook the blue hour, that brief window just after the sun has set when the sky still holds a rich, even blue. It is gentle, it balances beautifully with warm artificial lights, and it makes the whole scene feel intentional rather than murky. It does not last long, so when you see it starting, you move.
A quiet word about noise#
When you push a camera to see in the dark, it sometimes introduces a grainy, speckled texture called noise. A little of it is normal and honestly not worth losing sleep over. A clean, well-lit night photo with some grain beats a noiseless photo of nothing.
You can reduce it without spending money. Keeping your exposure longer and your sensor's sensitivity lower tends to produce cleaner files than cranking the sensitivity sky-high. That is another reason the steady support matters so much: a stable camera lets you use a long, low-noise exposure instead of a fast, gritty one. And if some noise remains, a gentle touch of noise reduction in editing will smooth it out. Gentle, again. Heavy-handed noise reduction smears away the very detail you stayed out late to capture.
Be where you are, and be safe#
Here is the part that is easy to skip and genuinely matters. Night photography puts you in quiet places, often alone, often absorbed and looking at a screen instead of your surroundings. That is a vulnerable combination, so build a few simple habits.
Tell someone where you are going and roughly when you will be back. Trust your instincts about a place; if somewhere feels wrong, it is not worth the photo, so leave. Keep one ear and one eye on the world around you rather than disappearing entirely into the viewfinder. Bring a small light so you can see your footing and your gear. Watch for traffic if you are working near roads, especially when you are crouched at a low angle chasing light trails. And respect where you are: obey signs, fences, and local rules, and get permission before working on private property.
None of this is meant to scare you off. The opposite, really. A little awareness lets you relax into the work, stay out a bit longer, and come home with the photographs and the calm. The dark is not something to conquer. It is somewhere to be, quietly, with a camera held still, waiting for the light to find you.